
This article explains how to whitelist and verify phishing domains within the OutThink platform. Whitelisting a domain ensures it can be used for phishing simulation campaigns. Verification is completed via a one-time passcode (OTP) sent to the account’s registered email address.
Step 1: Navigate to Settings
Log in to your OutThink account. Click the Settings icon located in the top right corner of the platform.

Step 2: Open Domains & Whitelisting
In the left-hand navigation panel, locate the Phishing section. Click on Domains and Whitelisting. All configured domains will be displayed on this page.
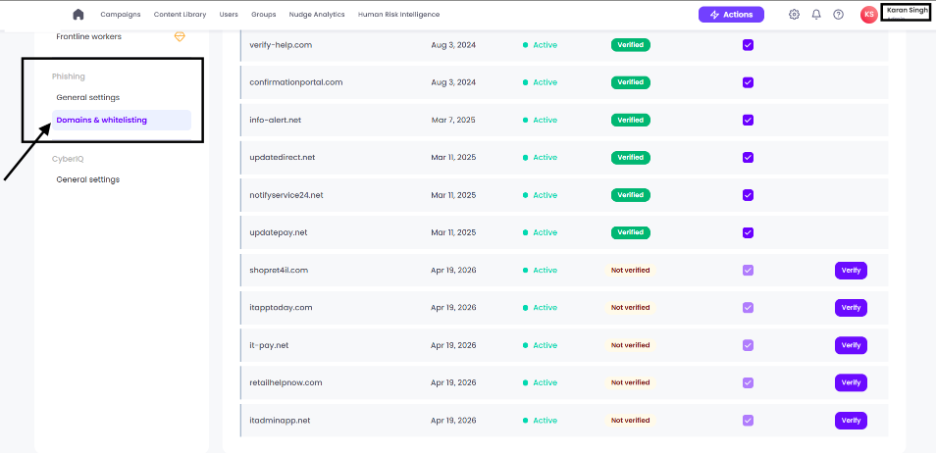
Step 3: Initiate Domain Verification
Locate the domain you wish to verify in the list. Click the Verify icon next to the domain. A confirmation prompt will appear click Yes Continue to proceed.
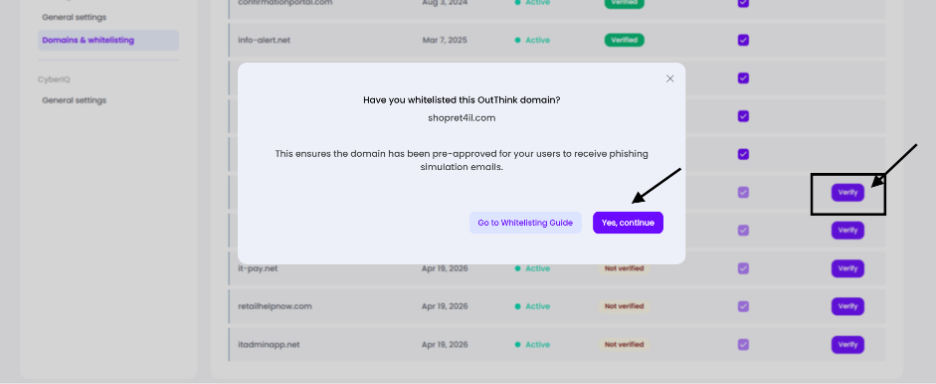
Step 4: Enter the OTP
A new page will appear prompting you to enter a One-Time Passcode (OTP). The OTP will be sent to the email address associated with your OutThink account. Enter the OTP in the provided field and submit.
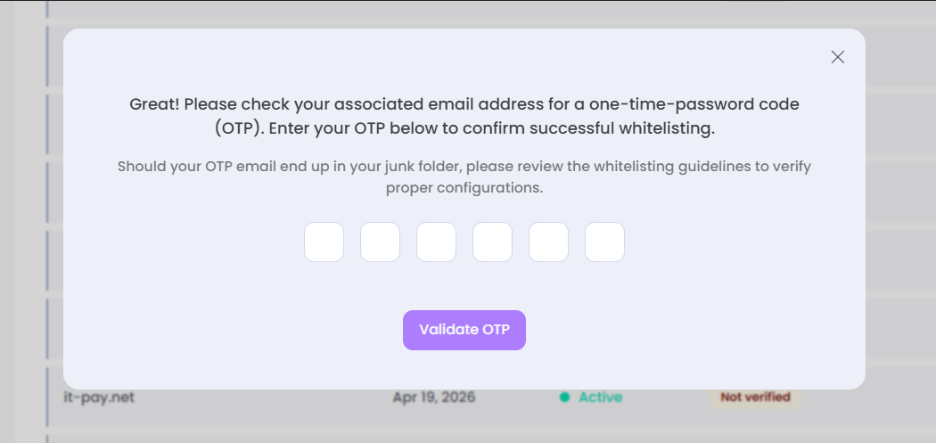
Note: Check your spam or junk folder if you do not receive the OTP within a few minutes. This will not work if DMI method is selected for Email delivery.
Step 5: Verification Complete
Once the OTP is successfully validated, the domain will be marked as verified and will be ready for use in phishing simulation campaigns.
Troubleshooting
| Issue | Resolution |
| OTP not received | Check your spam or junk folder. Ensure the correct email is linked to your account. |
| Domains and Whitelisting not visible | Confirm you have Administrator-level permissions on the L1 org. |
| OTP expired | OTPs are time-limited. Click Verify again to request a new code. |
| Domain still unverified after OTP | Refresh the page and check the domain status. Contact OutThink support if the issue persists. |
Was this helpful?
1 / 0