
This section defines the setup for Single Sign On for End-Users when accessing their training. If you wish to enable the SSO option for administrators when accessing the Command Center, refer to the documentation here.
OutThink supports several different means of delivering training to end-users, including direct web-browser based delivery (“headless”), or delivery via a corporate Learning Management System (LMS). When accessing training directly in a browser, the default configuration is to provide users with seamless access to their training, delivered via unique time-limited hyperlinks. However if desired, end-users can be forced to authenticate with their corporate credentials (single sign on) whenever they access their training or their CyberIQ dashboard.
This article describes how to set up a federation with your identity provider (IdP) supporting the OpenID Connect (OIDC) protocol. When you set up the federation, end-users are forced to use their organizational account to sign in before they can review or complete their training. Examples of OIDC Compatible Identity Providers include Microsoft Entra ID, Auth0, Okta, Google and many others.
Single Sign On for End-Users is configured globally for all organizations in your tenant simulatenously.
1. Obtaining the Redirect URL
The first step is to obtain the OutThink Redirect URL that is required when configuring your Identity Provider. This is provided from the OutThink Command Center.
- Sign-In to the OutThink Command Center and navigate to Settings.
- Select the top-level Organization on the left hand side, and select the Single Sign On (SSO) option under CyberIQ.
- On the right hand side, switch ON the configuration and at the bottom of the screen, copy the URL under the heading Redirect URL to pass to your identity provider. Record this redirect URL, as you will need it in the following step.
2. Configure your Identity Provider
This section provides guidance for customers using Microsoft Entra ID as the Identity Provider.
For all other identity providers, consult your help or support documentation.
Entra ID Identity Provider Configuration
- Sign in to the Microsoft Entra admin center as at least an Application Developer.
- If you have access to multiple tenants, use the Settings icon
 in the top menu to switch to the tenant in which you want to register the application.
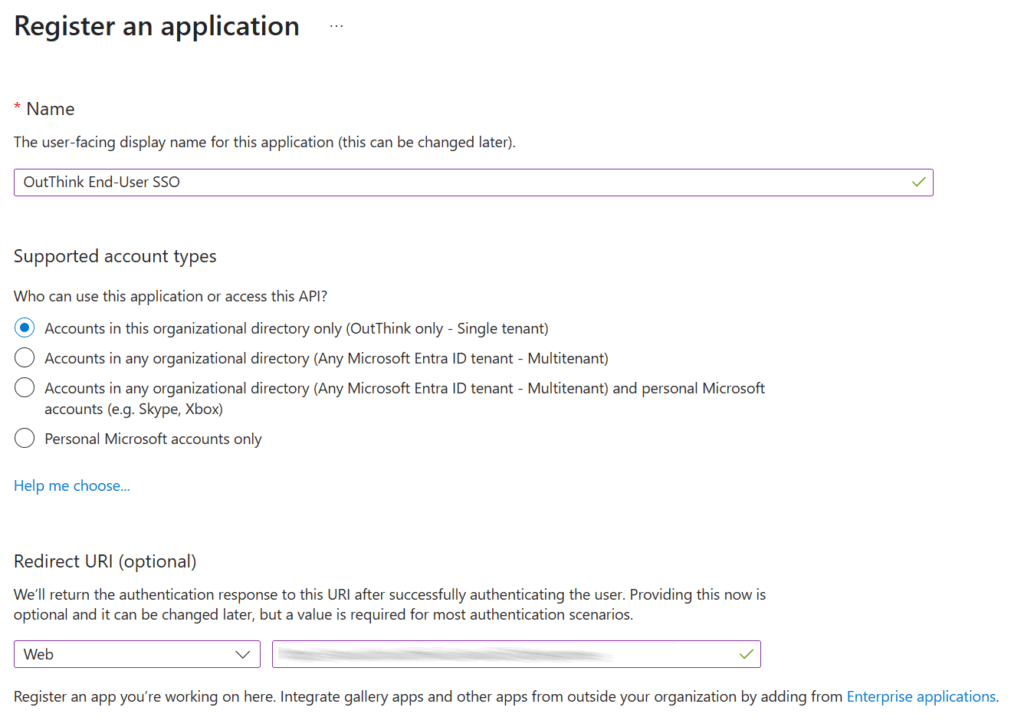
 - Browse to Entra ID > App registrations and select New registration.
- Enter an appropriate name for the application, such as
OutThink End-User SSO. - Under Supported account types, select the option
Accounts in this organizational directory only. - For Redirect URI, select the
Webplatform and enter the Redirect URL recorded from the previous section. - Click Register.
- Enter an appropriate name for the application, such as
- The application’s Overview page is now displayed. Record the Application (client) ID, which uniquely identifies your application. You will need this in the following step.
- Remaining on the Overview page, now click the Endpoints button in the top header menu and find the property called
Authority URL (Accounts in this organizational directory only). - Record the value of the property, but when recording it, update the value to include the /v2.0 suffix if it doesn’t already.
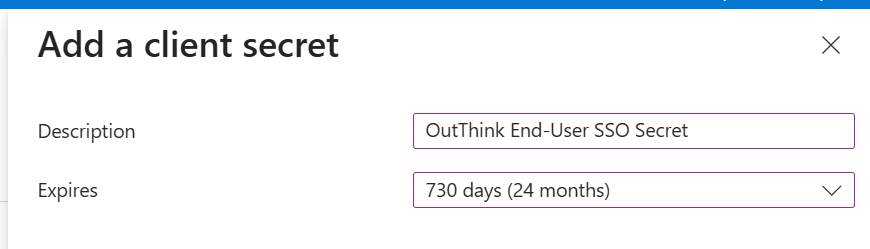
For example, if the Authority URL is https://login.microsoftonline.com/abc, safely record the value https://login.microsoftonline.com/abc/v2.0. You will need this in the following step. - Navigate to Manage > Certificates & Secrets on the left hand menu panel and select
+ New client secreton the right. - Provide an appropriate Description for the new secret, and set the Expires option. Set the expiry to an appropriate period of time to comply with any internal security policies. Now click
Addat the bottom of the screen.
- On the new secret entry that is now displayed, immediately copy the
Valueproperty and record this safely. This is the only time you will be shown this value. This is known as the Client Secret and you will need this in the following step.
3. Setup configuration via the Command Center
Navigate back to the Command Center End-User SSO section (as described in section 1).
The following screen is displayed:
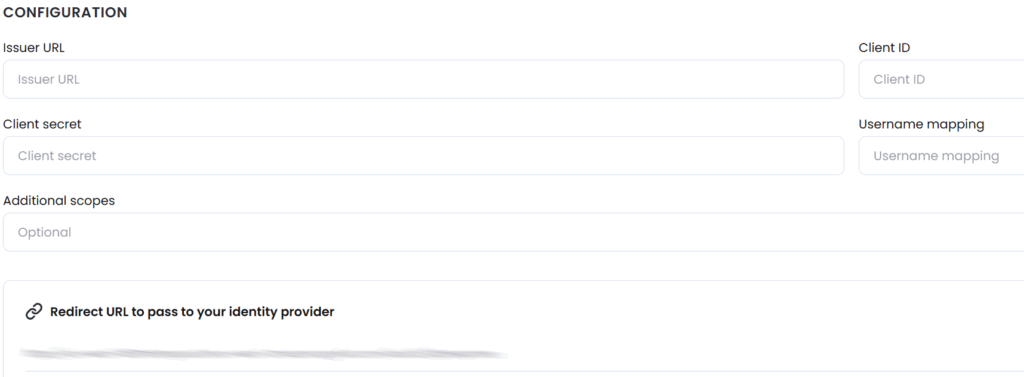
This describes each of the required fields in more detail. In all cases, consult your Identity Provider help or support documentation for additional information.
| Setting | Details |
|---|---|
| Issuer URL | The complete URL of the OpenID Provider. |
| Client ID | The client identifier, as registered with the OpenID Provider. |
| Client secret | Client secret is used in conjunction with the Client ID to authenticate the client application against the OpenID Provider. |
| Username mapping | An attribute from your IdP that uniquely identifies a user and can be mapped to the username in OutThink. For example, if you entered ${NameID}, we would use the values of this attribute from your IdP as usernames. Check your IdP documentation for the list of attributes.Note: When your Identity Provider is Microsoft Entra ID, the username oid is typically required here. |
| Additional scopes | Optional scopes are used by an application during authentication to authorize access to a user’s details. Each scope returns a set of user attributes, which are called claims. The default scope required is openid. Add more scopes (comma separated) if needed to obtain the username claim. |
If you followed the guidance in Step 2 for Microsoft Entra ID:
Issue URL = The value recorded from the Authority URL in the previous step (including
/v2.0suffix).
Client ID = TheApplication (client) IDrecorded in the previous step.
Client secret = TheValueof the secret recorded in the previous step.
Username mapping =oid
Leave the Additional scopes field empty.
Once populated, click Save.
Be aware that as soon as you save the new settings, all end-users will be forced to authenticate when accessing training. It is therefore advisable not to change these settings if a campaign is in progress, and to consider making these changes at an off-peak time for your organization.
3. Test the configuration
It’s important to now test the configuration. This can be done by either creating a new test training campaign via the OutThink Command Center, or navigating to your unique CyberIQ URL.
To test by sending a training campaign, click the Start now (or equivalent) button or hyperlink in the received training invitation email.
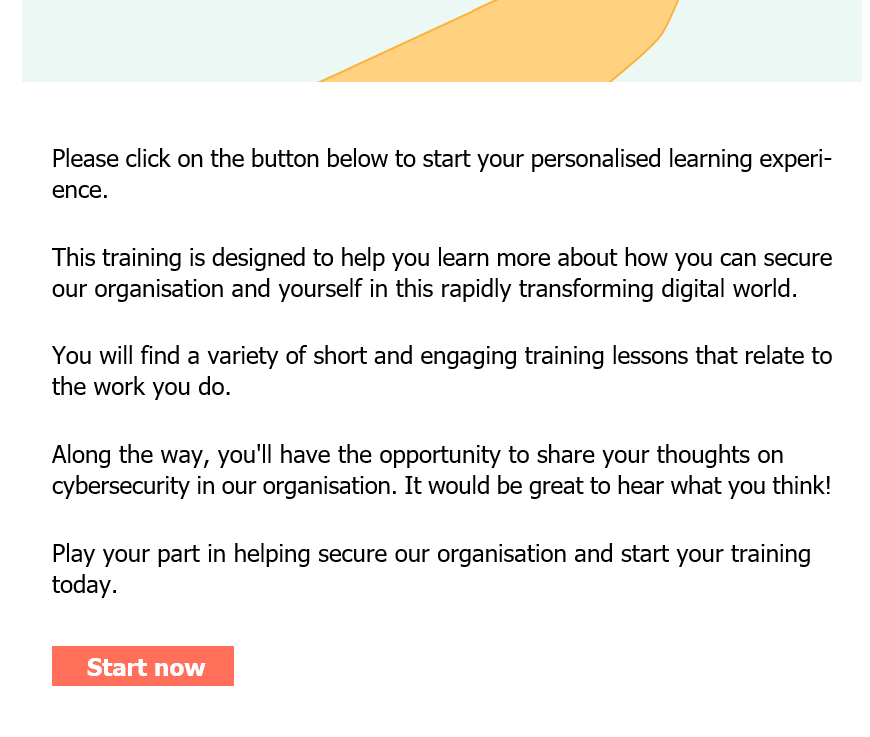
Your web browser should be launched and redirected to your familiar corporate authentication screen, via the OpenID Connect authentication flow. Be aware that if you already have an authenticated session at your Identity Provider, it may not ask you to re-enter credentials at this time (this is the expected single sign on flow).
At this point, ensure that you are correctly redirected to the Learner Dashboard and the training is available to be completed. If there are errors in the authentication flow, check the settings carefully in both the Command Center and at your Identity Provider.
Was this helpful?
4 / 0